1.5 Launchpad Walkthrough
This section guides you through the deposit process using the LUKSO Validator Deposit Launchpads. Depositing funds is a critical step that activates your validator keys and enables your node to participate in staking, which in turn generates income.
If you're not quite sure about Hardware Preparations, Blockchain Fundamentals, or the basics of Node Operations, please refer to the 🧠 Theory section to build a solid foundation of knowledge before continuing with the validator or node setup.
Further details about validator operation and deposit instructions can be found on the Staking Deposits page.
After you have generated your deposit keys, you can visit the LUKSO Validator Deposit Launchpads to stake funds:

Always double-check the lukso.network domain before continuing the deposit process.
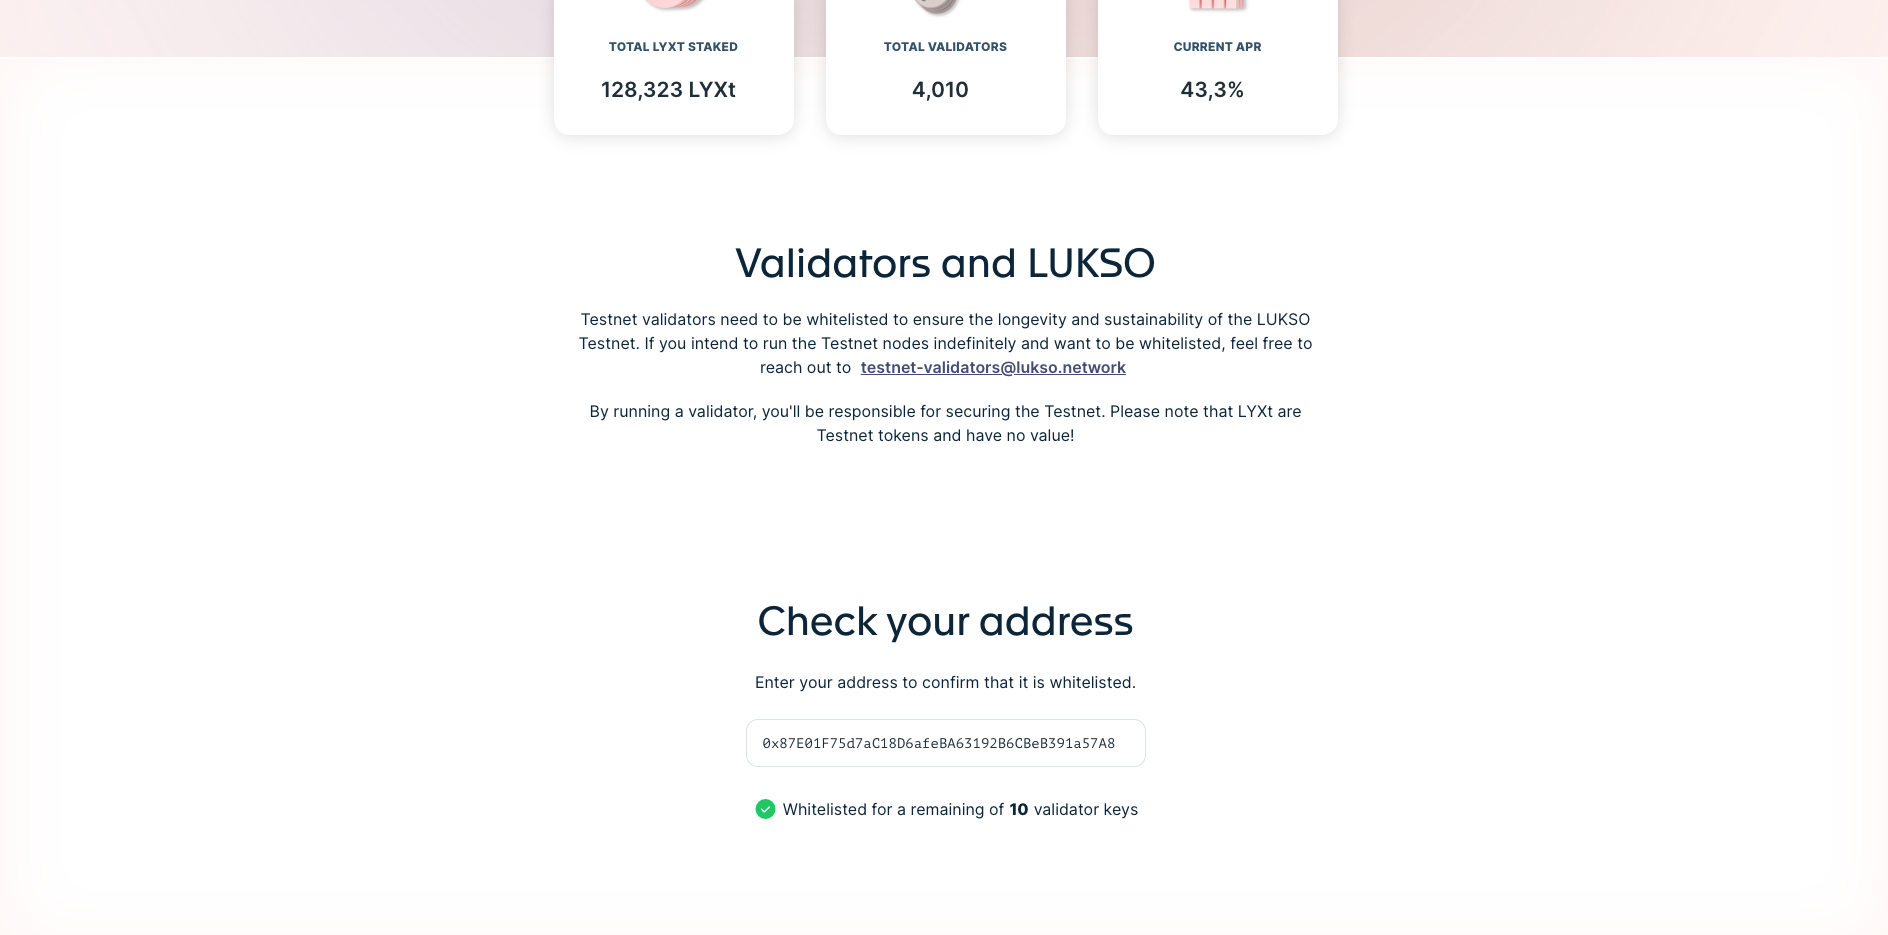
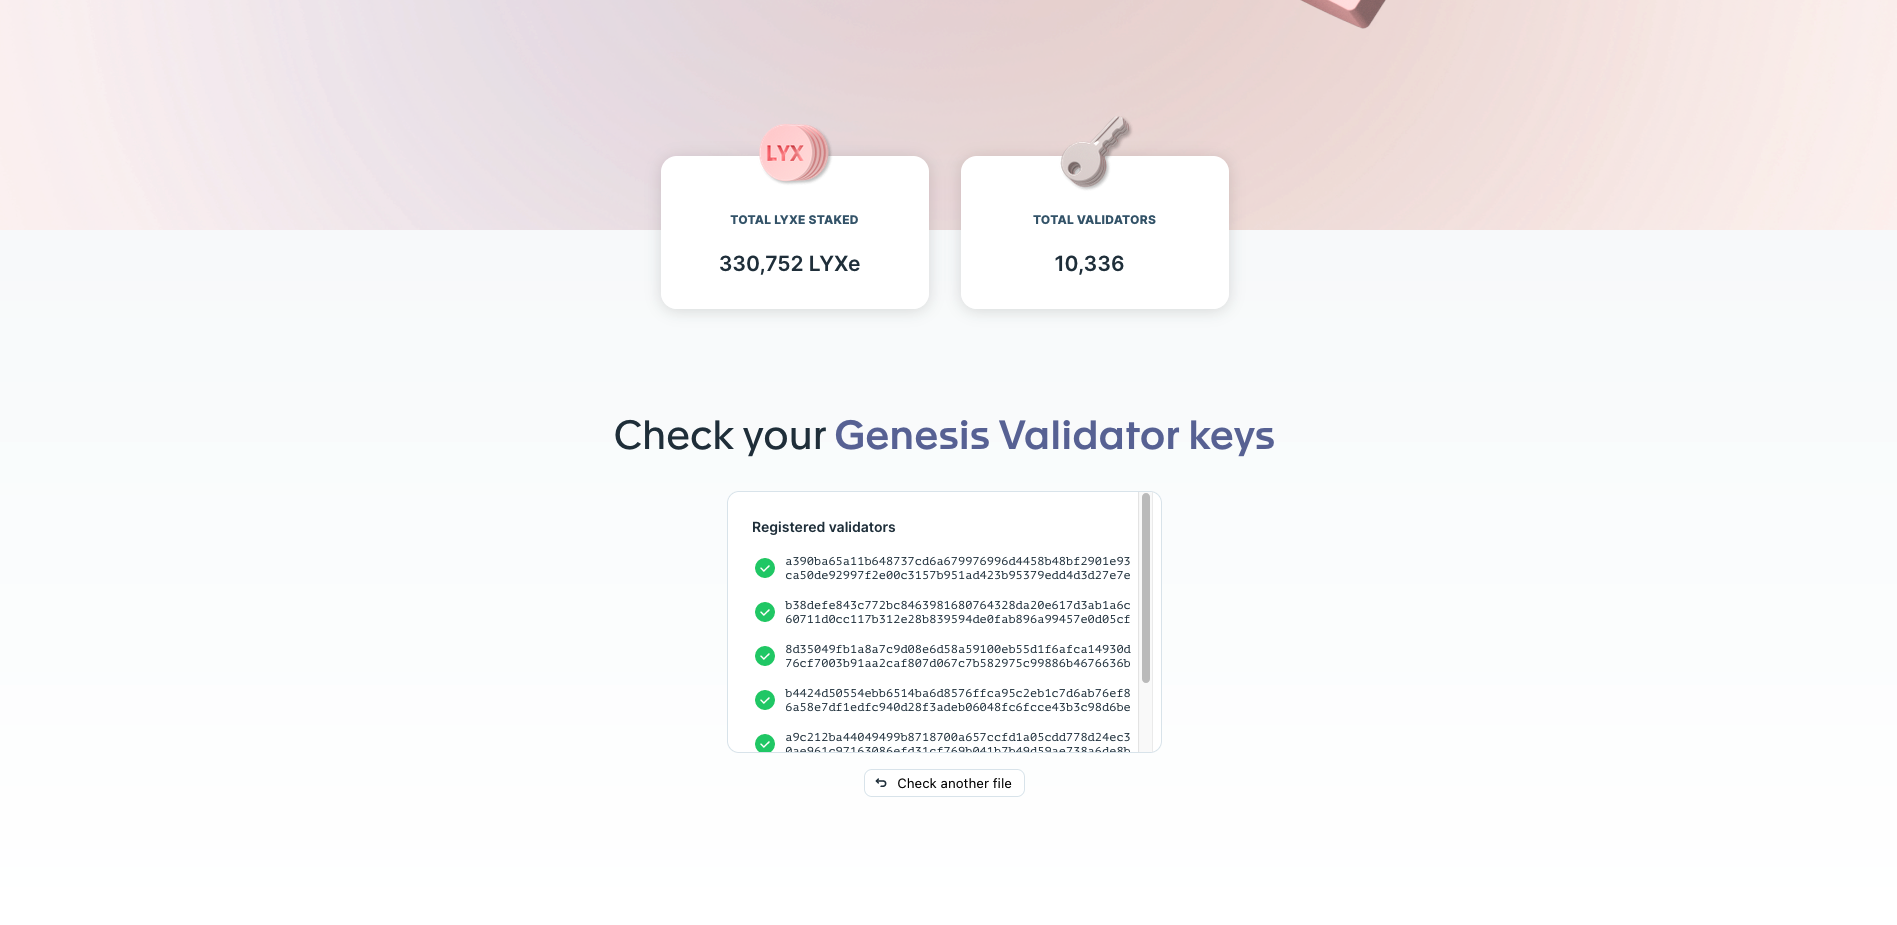
Take a moment to review the launchpad’s functionality and statistics. For each network, you will see details such as the total staked amount of LYX or LYXt, the total number of validators, and the current Annual Percentage Rate during staking, which is particularly useful for monitoring the network dynamics.
1. Preparing Deposit Files
Before making any deposits, you must prepare and verify your deposit files on the launchpad. If you only have one wallet with enough LYX or LYXt to fund your validator keys, you can use one single deposit file during the process. However, if you have multiple wallets or currently only have enough funds to activate a smaller amount of validators, you must prepare or split your deposit file.
1. You Generated Batches with the Same Seed
- If you created separate batches for each wallet, you likely have multiple deposit folders.
- Each deposit folder should contain one or multiple deposit key files
- Each deposit folder should conatain one deposit_data.json file
🙇🏻♂️_Example: With 30 validators across 3 wallets containing 320 LYX or LYXt, you should have 3 deposit files.
2. You Modify the Deposit File
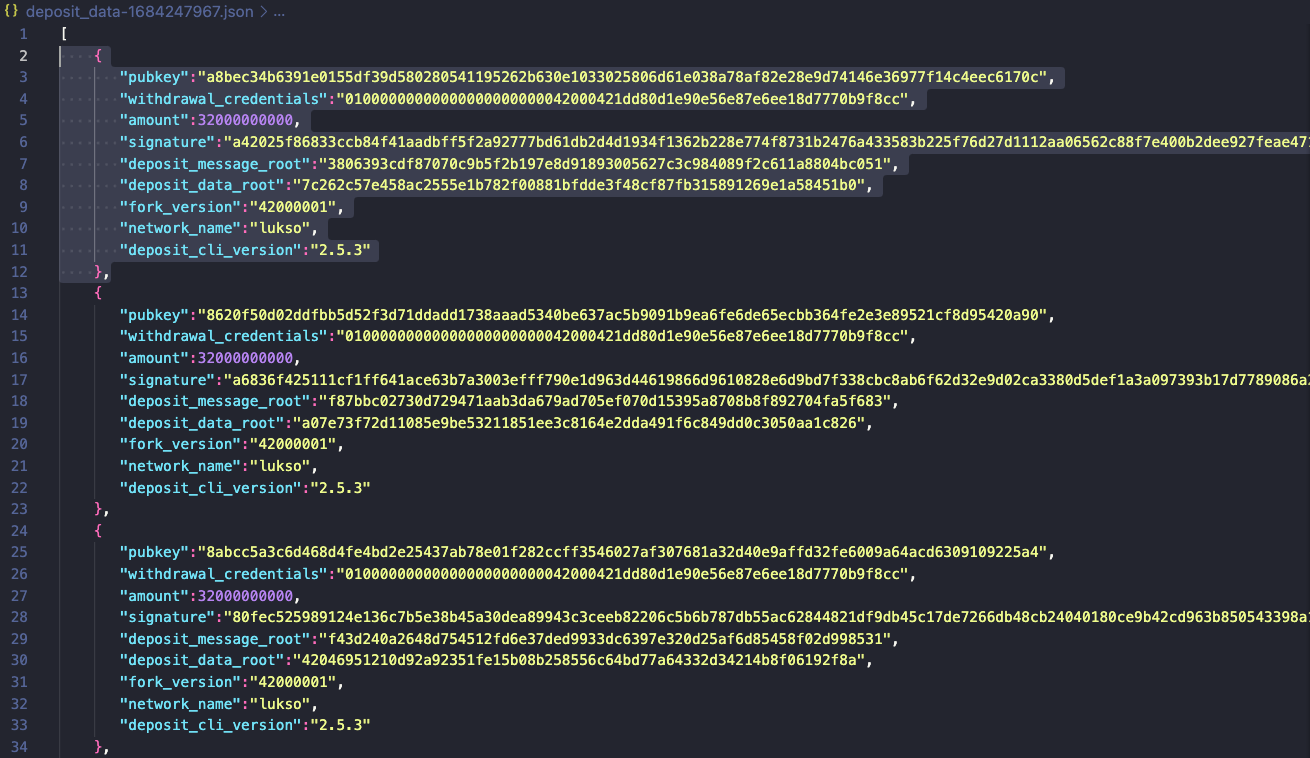
- If you generated all keys in one run, you will have a single folder with one comprehensive deposit_data.json file.
- You will have to duplicate the file for each wallet and use a JSON Editor to remove specific
pubkeyentries - Each file then only contains the deposit keys for one wallet.
🙇🏻♂️ Example: 30 validators across 3 wallets, generated 3 file copies and removed pubkey entries manually:
- Only kept the first 10
pubkeyentries for wallet one and removed the rest. (validators 1-10) - Removed the first and last 10
pubkeyentries for wallet two. (validators 11–20) - Removed the first 20
pubkeyelements for wallet three. (keeping validators 21–30)
If your wallets hold different amounts of LYX or LYXt, adjust the subkeys and validator counts of the deposit file accordingly to match holdings. If you only want to fund some of your validator keys later, you can create a copy of the deposit file and remove the last pubkey elements.
In case you chose to modify the deposit file copies, an editor with JSON formatting support is highly recommended. It will help you verify that the JSON structure remains valid and that commas and brackets are correctly placed.
Great and free examples of editors with JSON formatting are 🦎 Notepad++ or 🔹 Visual Studio Code.
2. Checking Deposits
If you're a Genesis or Testnet Validator, the prepared deposit files can be checked again before starting the staking launchpad process. Icons are then used to indicate whether the file is valid and whether it contains validation keys that have already been used.
Further details about validator differentiations can be found on the Staking Deposits page in the 🧠 Theory section.
- Genesis Validators
- Testnet Validators
- Mainnet Validators
Geneses Validators were able to upload their deposit file to the front page of the Staking Launchpad. You could observe the status icons for each validator key element. Unused deposit keys display grey symbols, indicating that no funds have been deposited yet. If they showed green arrows, you knew that those could be removed from the file, because you cannot find a key twice.
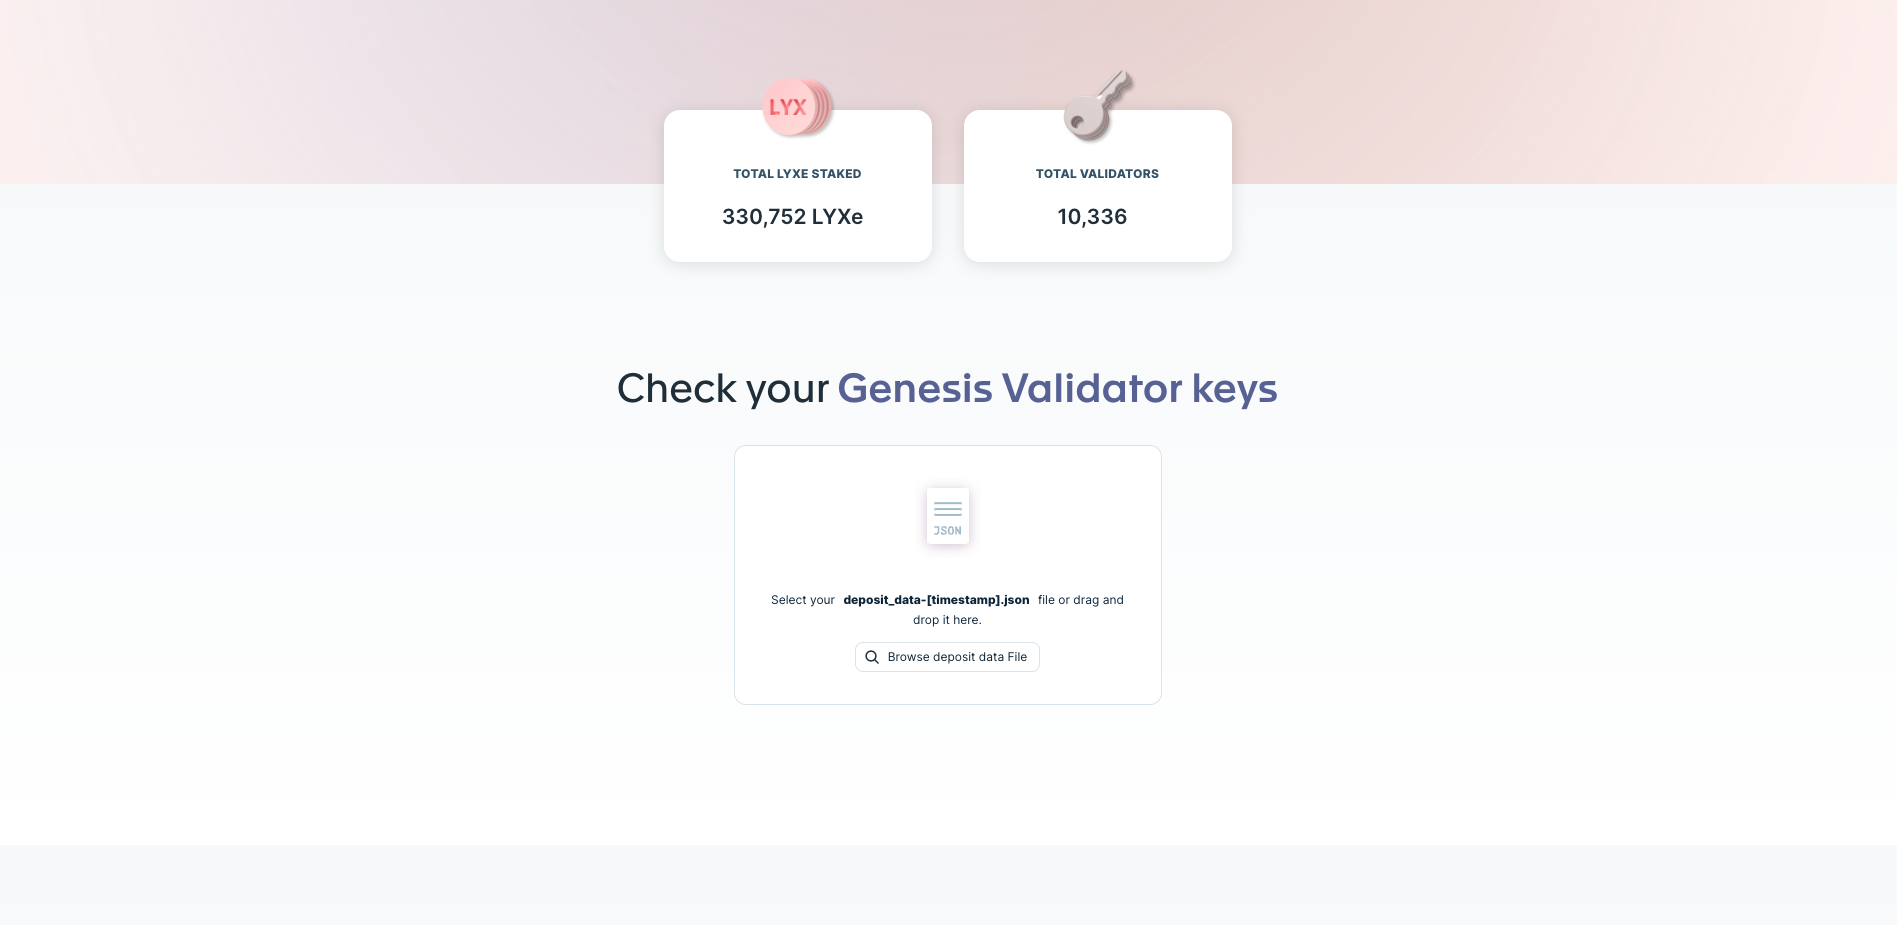
It was advisable to keep a second browser window open displaying the complete deposit file to monitor the deposits in real-time.
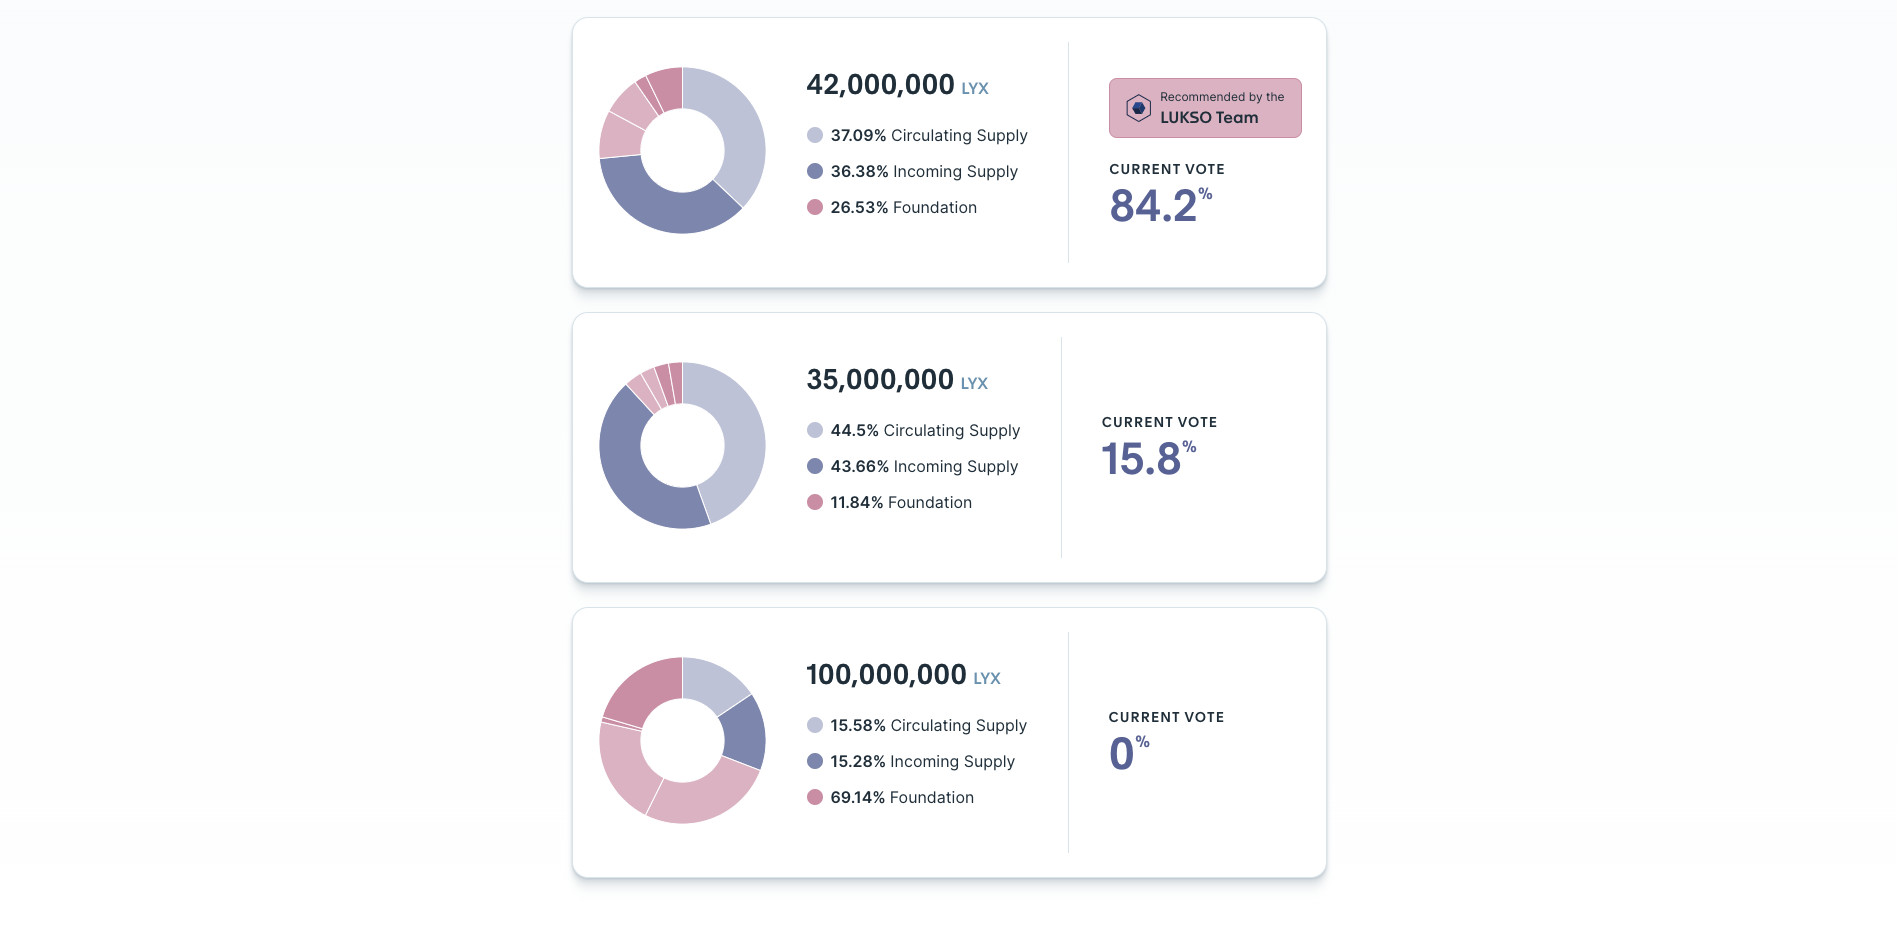
Additionally, the genesis validators could view the current votes for the network's initial coin supply.
If you're a Testnet Validator, you're allowed to check the deposit status by verifying your address. Each wallet will display the number of validators you are eligible to deposit. Each wallet must previously whitelisted by the LUKSO team.
Whitelisting only affects the ability to make deposits, not becoming a validator. If you are removed from the whitelist before all validators are deposited, you will not be able to proceed. You can find further information on becoming a Testnet Validator on the related LUKSO Tech Documentation or the Staking Deposits page.
The Mainnet Staking Launchpad only supports deposit checks in the final transaction window after submitting the deposit file and connecting your wallet. The wallet must contain enough LYX or LYXt to proceed to the final screen.
3. Placing Deposits
You can initiate the deposits by the clicking Become a validator button on the Staking Launchpad.
Deposits can only be made once and cannot be refunded in the event of an error.
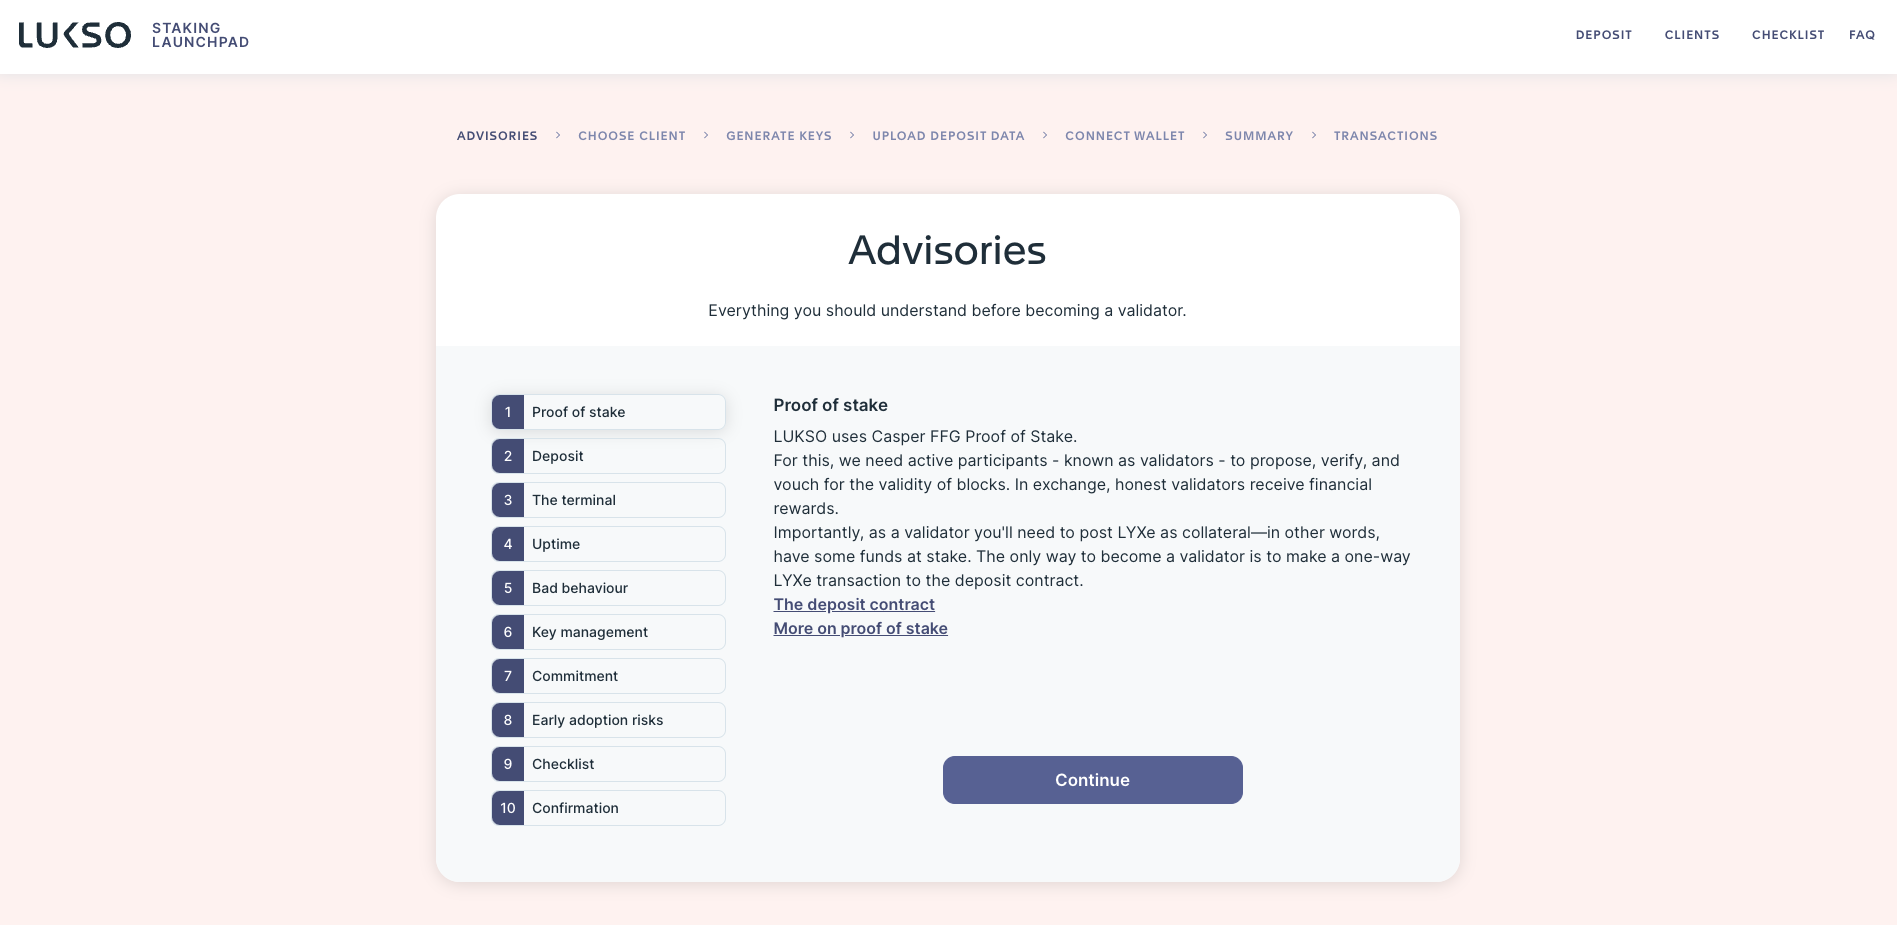
- Review Information: Carefully read all the theoretical pages and informational content provided.
- Verify Wallet Balance: Check that the wallet’s LYX or LYXt balance meets the minimum requirements.
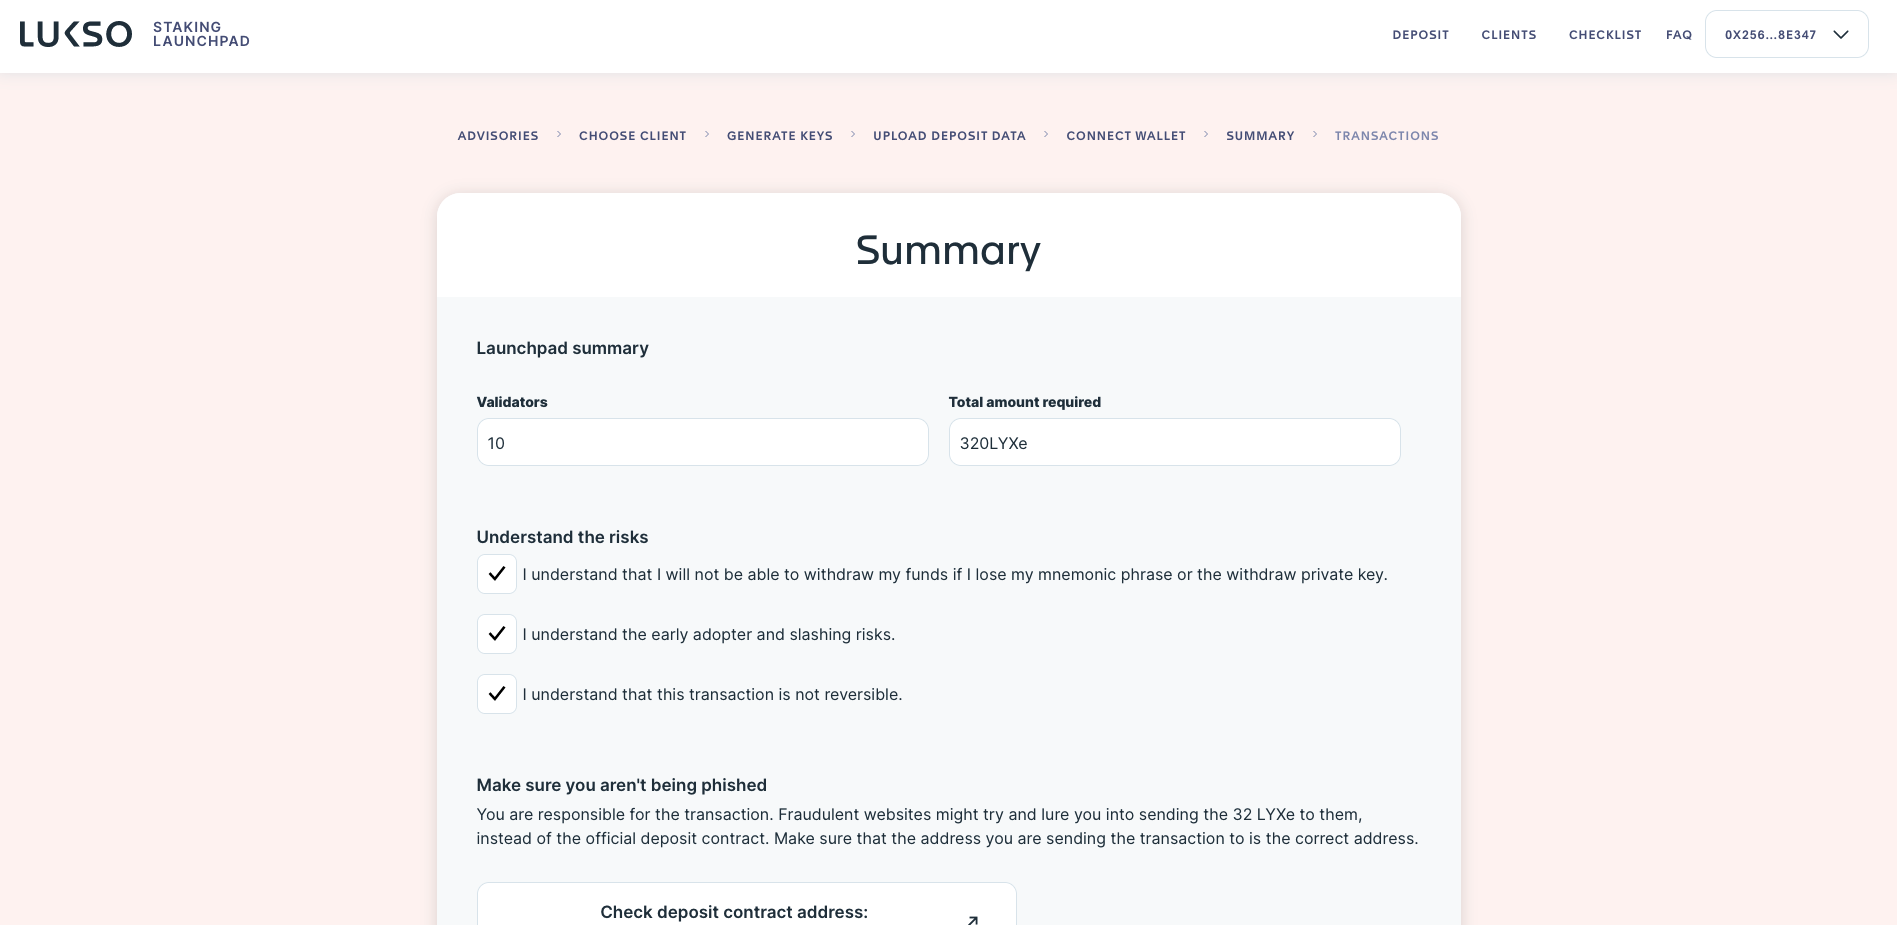
- Confirm Deposit File Details: Review the summary of your deposit keys, which will be transformed into transaction data.
1. Read through the Information: Review the first 10 pages of necessary blockchain knowledge.
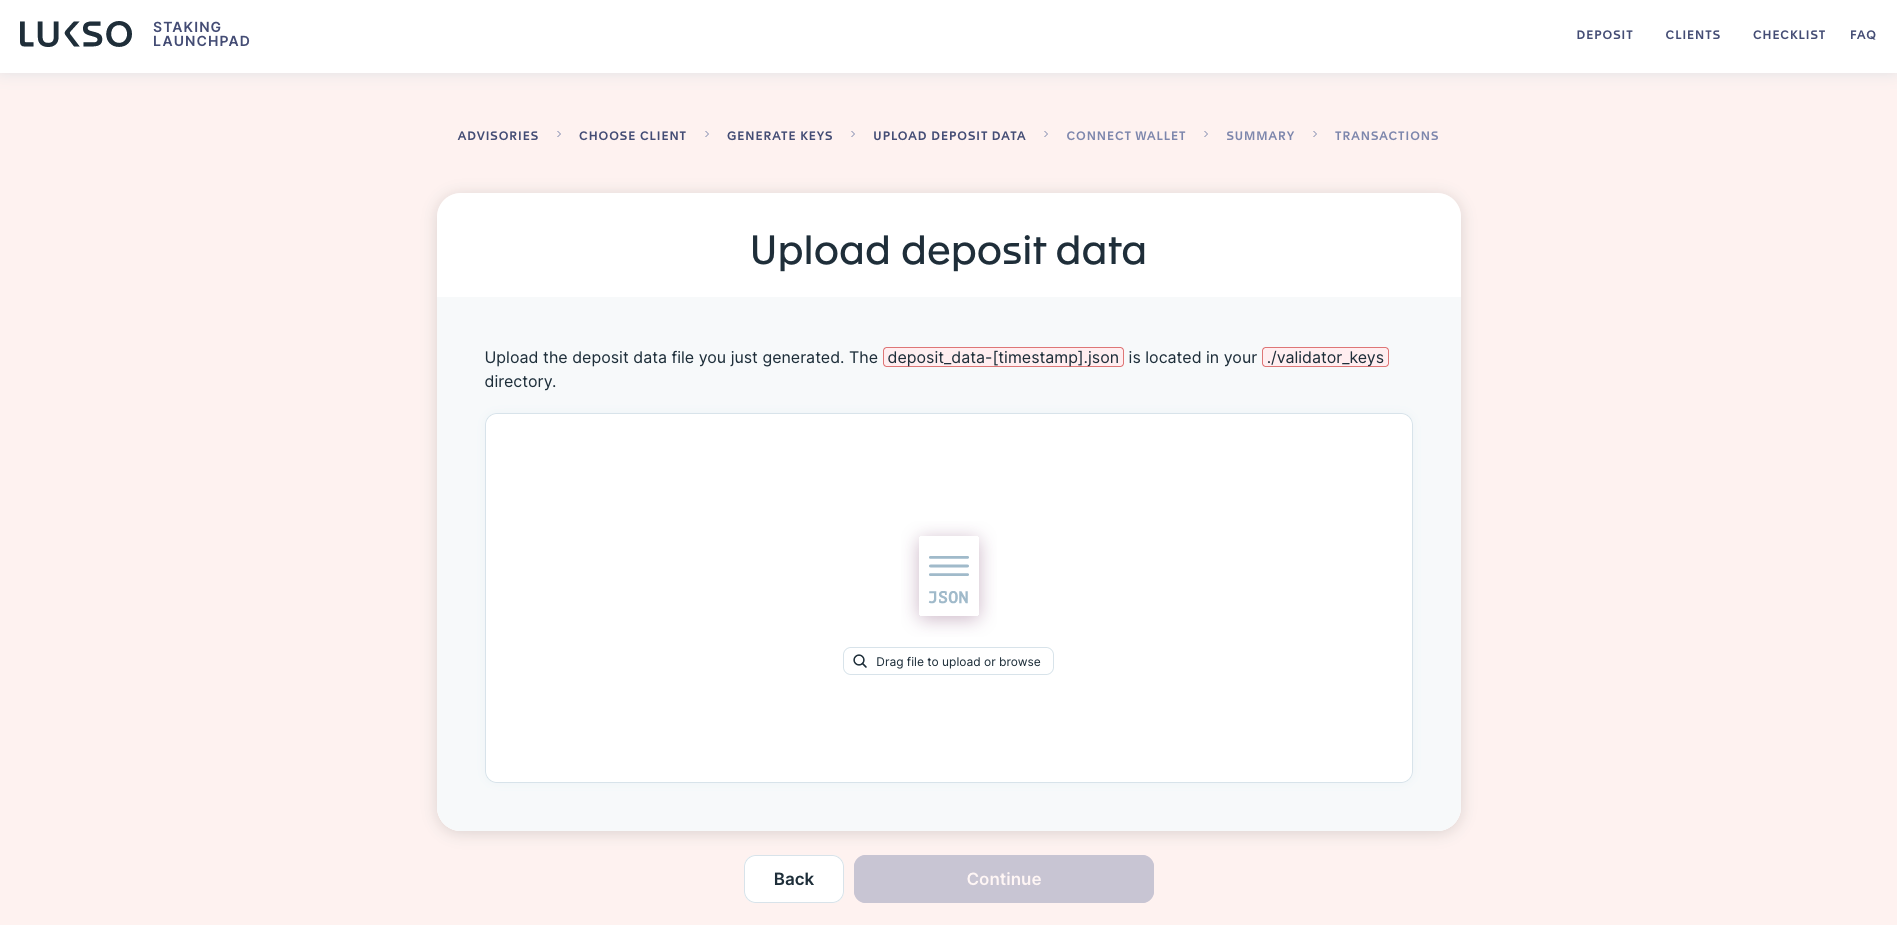
2. Upload the Deposit File: Proceed by uploading one single deposit file per walkthrough.
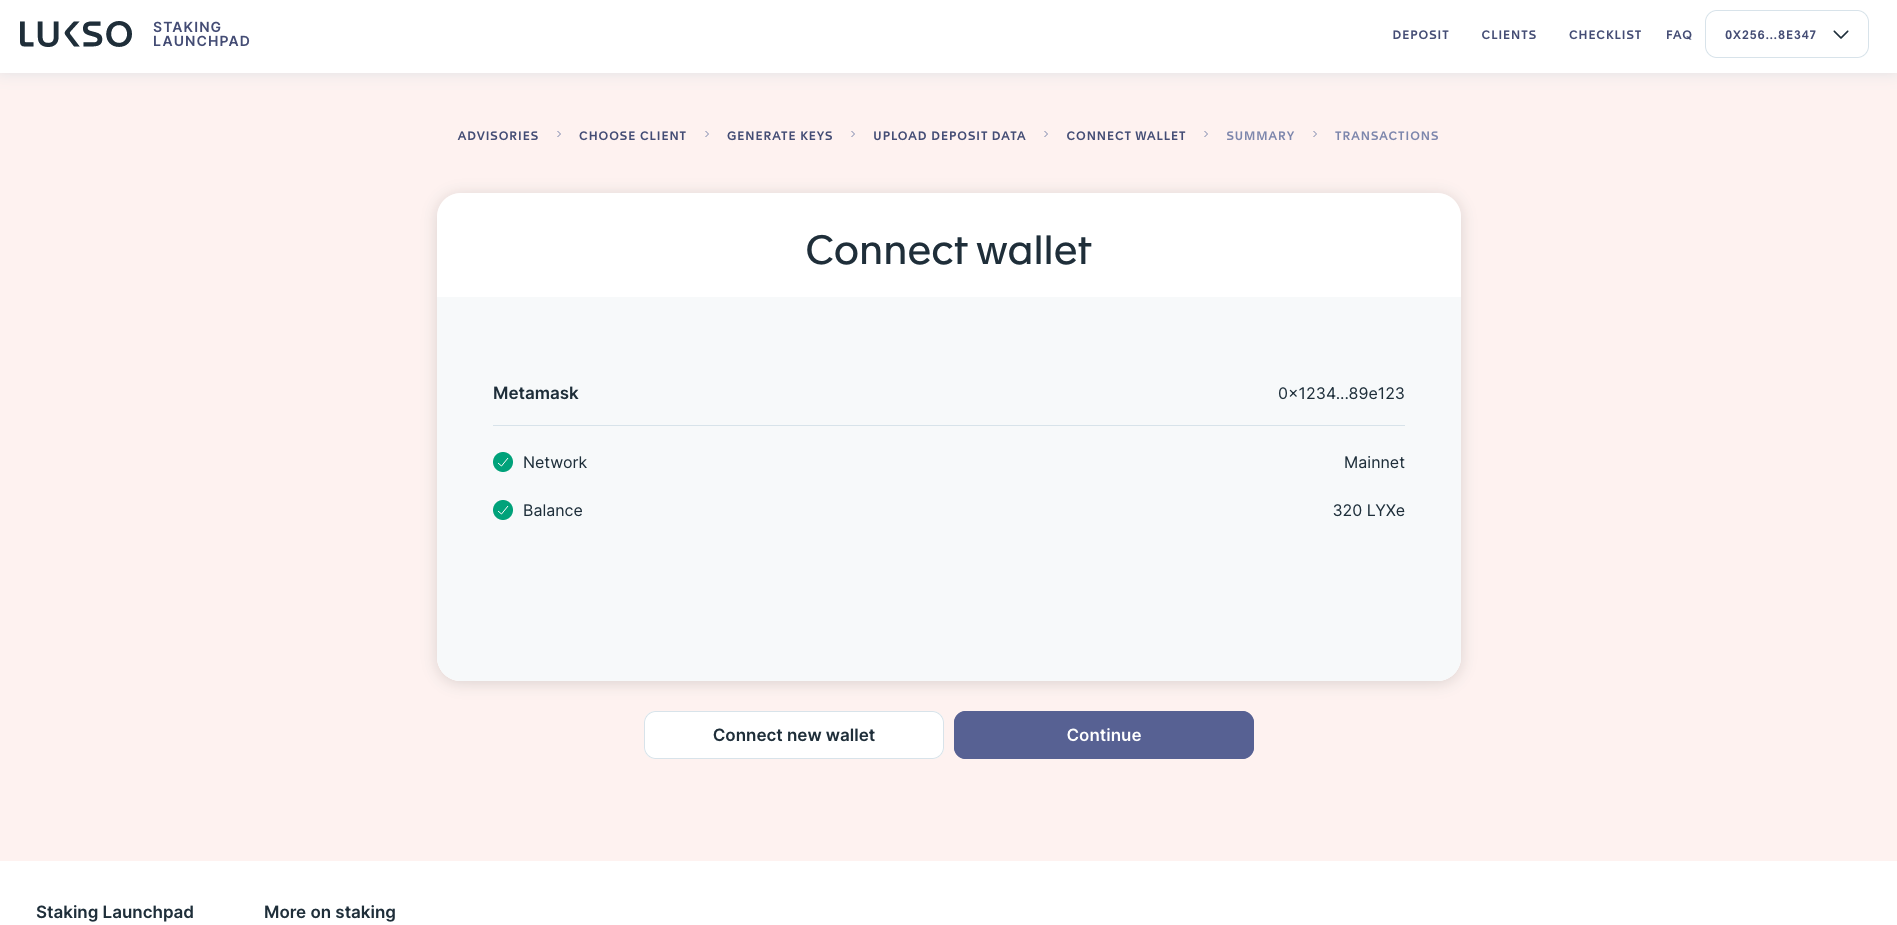
3. Connect the Wallet: Connect your wallet containing enough LYX or LYXt to fund all keys within the file.
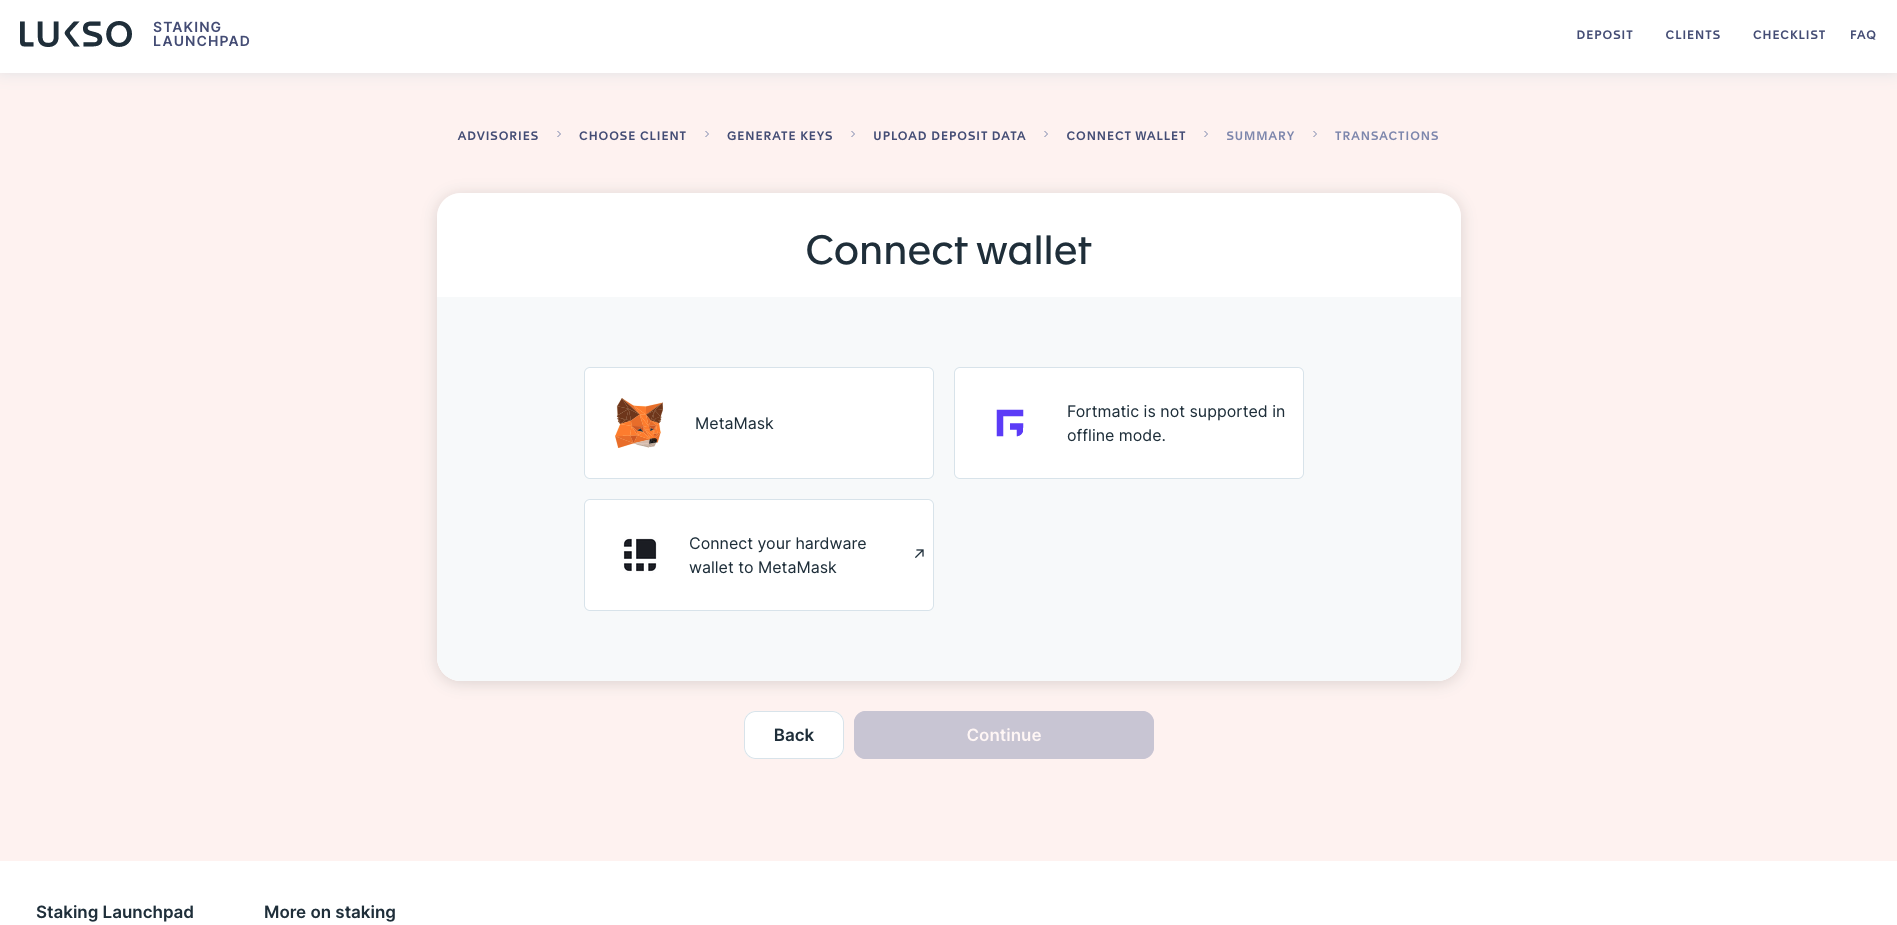
While the Staking Launchpad only supports MetaMask as browser wallet, you can still link your hardware wallet or send LYX to a different Ethereum address. It will show up once you've added and switched to the LUKSO network.
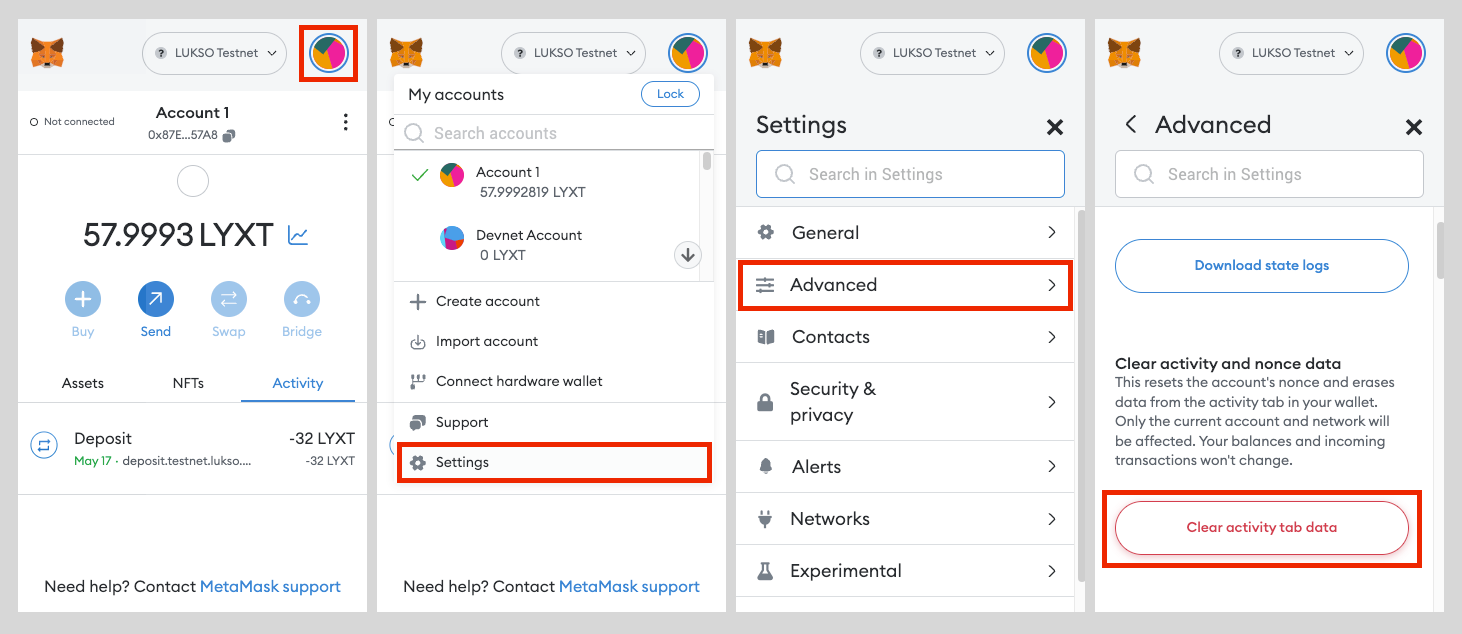
If you create deposits on the LUKSO Testnet, clean your MetaMask activity and nonce to avoid potential network conflicts.
4. Review Wallet Balance: The launchpad will fetch your balance and will allow you to continue with sufficient funds.
If you have insufficient funds or want to activate some of the generated validator keys later on, you can create a copy of the deposit file with a subsection of keys to fullfil the deposit requirements.
5. Confirm Summary Page: Review the summary of your deposit keys and agree to the terms to proceed with the transactions.
After the confirmation and setup, you will be able to send deposit transactions by either clicking Confirm deposit or Send X deposits. If you select the latter option, the transactions will be sent in series, and you will be prompted to confirm each one individually.
Please remain on the deposit page and monitor the transaction status. The deposit keys will initially show as ready and will update to pending, deposited, or failed based on the blockchain’s response. If a transaction error occurs and the option to resend from the final screen should not be available, restart the process from the home screen.
4. Checking Deposits
After the transactions have been sent, you can verify the status of your deposits using the provided transaction buttons.
- Genesis Validators
- Testnet Validators
- Mainnet Validators
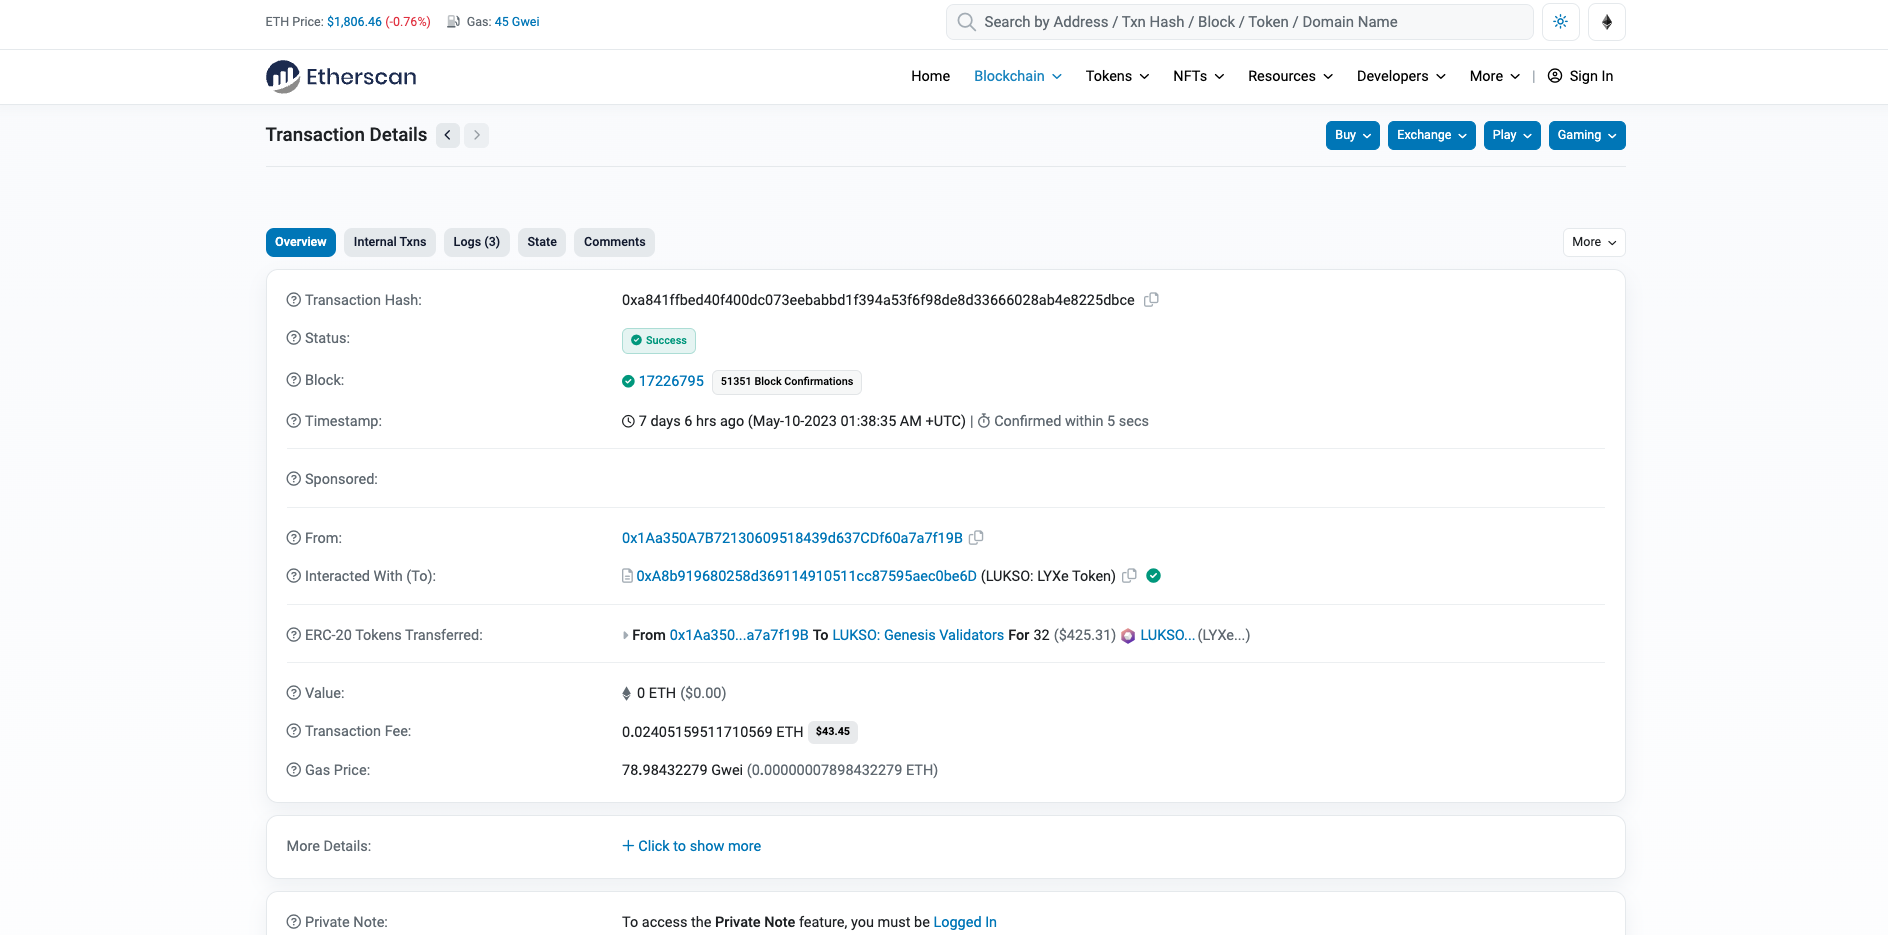
For Genesis Validators, the Ethereum Blockchain Explorer displayed all the deposit transactions to the Genesis Contract.
Genesis Validators were also able to review the deposit files on the Staking Launchpad. If all validator keys show as green, every deposit transaction was successful. In case some validator keys remained in grey, the deposit had to be repeated.
For Testnet Validators, the LUKSO Testnet Consensus Explorer will display the deposit transactions.
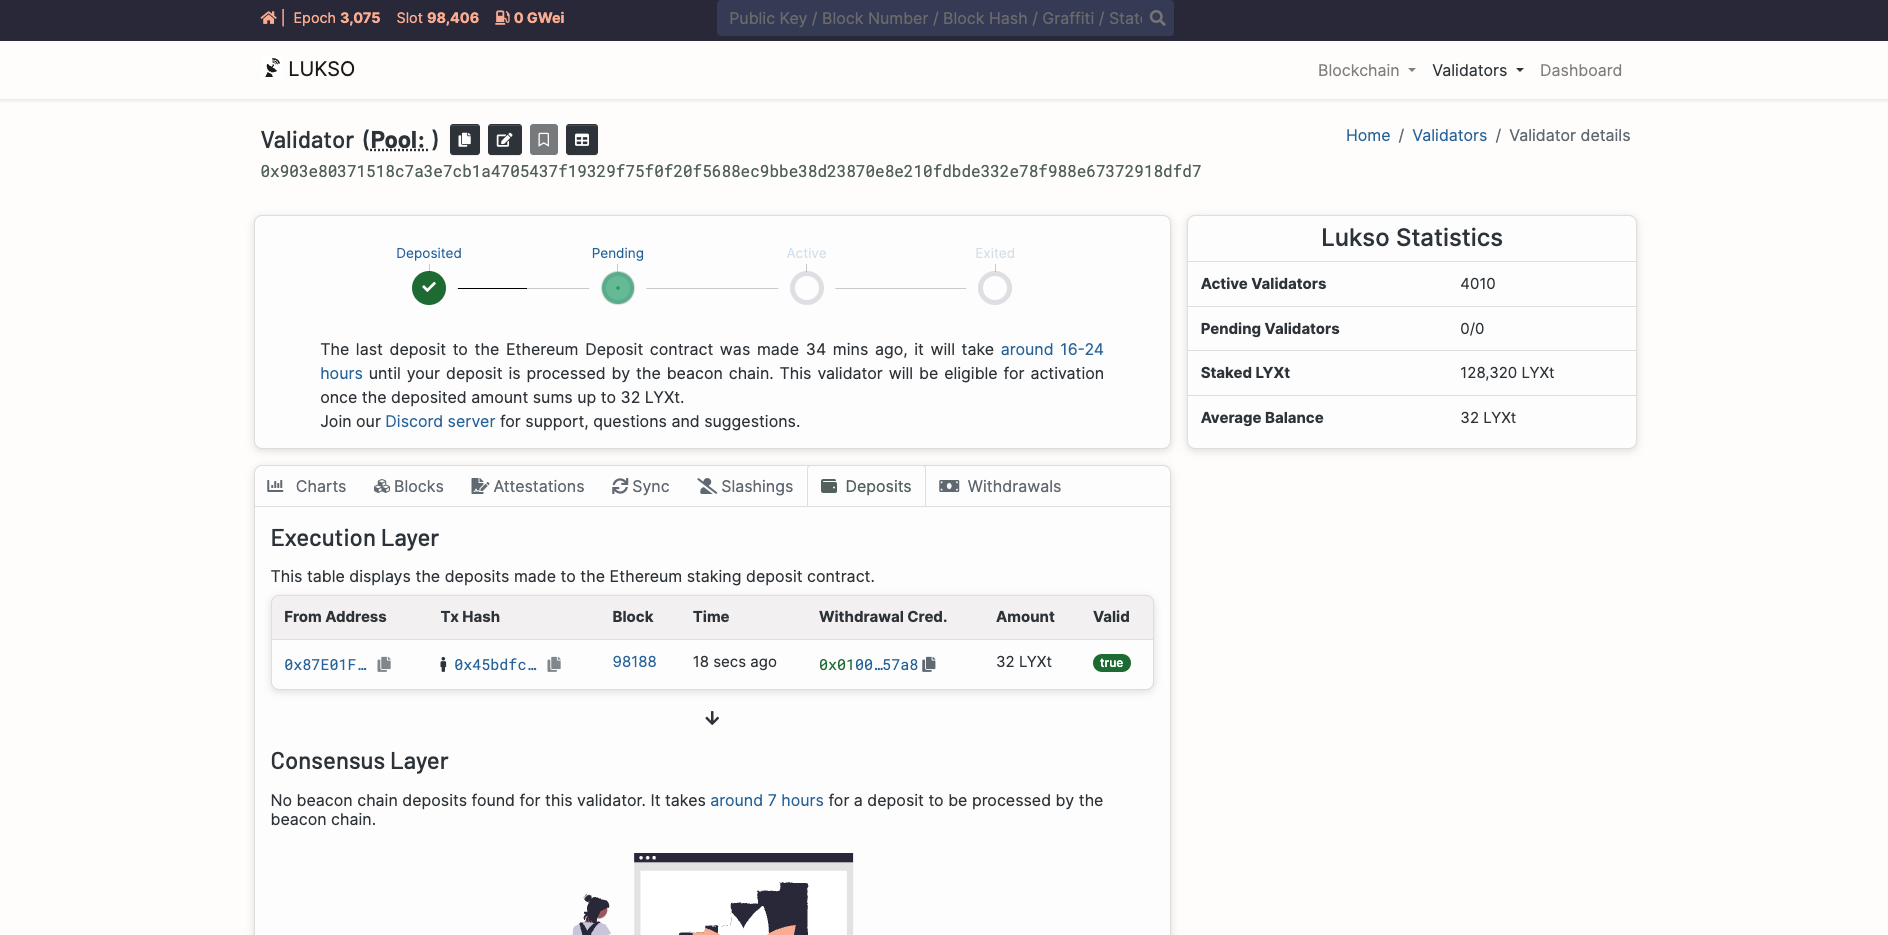
For Mainnet Validators, the LUKSO Mainnet Consensus Explorer will display the deposit transactions.
Validator activation can take up multiple days depending on the network occupation. You can already start to run your node using one of the Client Setups and import the validator keys. The validator clients will then run in idle mode until the blockchain is synced and validators got activated.