2.6 Ubuntu Configuration
Configuring Ubuntu for your blockchain node is a crucial step to ensure stability, performance, and secure connectivity. In this guide, we document the complete process and considerations for installing and setting up Ubuntu Server on your node.
For additional reference, you can view the official Ubuntu's Install Guide.
System Settings
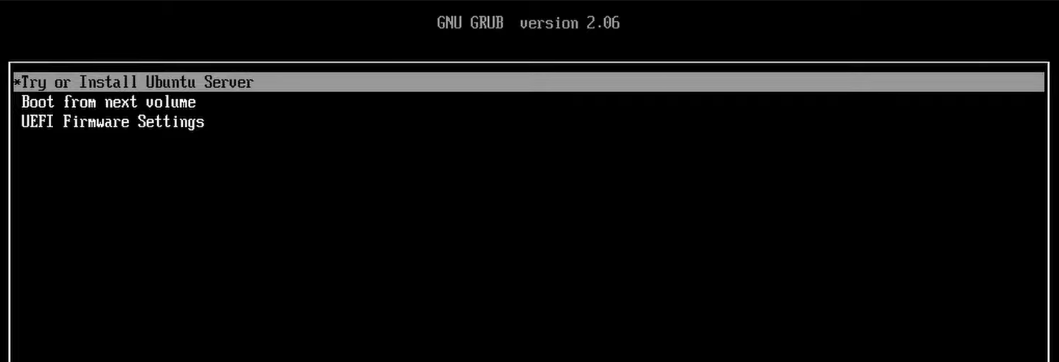
After completing the BIOS Setup and connecting the prepared bootable USB device, you should be faced with the Ubuntu installation screen. You can select Try or Install Ubuntu Server in order to boot up the operation system on the USB drive or copying and installing the full version on the primary hard drive.
Connect your machine to the router using an Ethernet cable so that the installer can receive updates. A stable internet connection and low latency is also necessary for running the blockchain and monitoring system later on.
More details about network usage and connections can be found on the Network Demand page of the 🧠 Theory section.
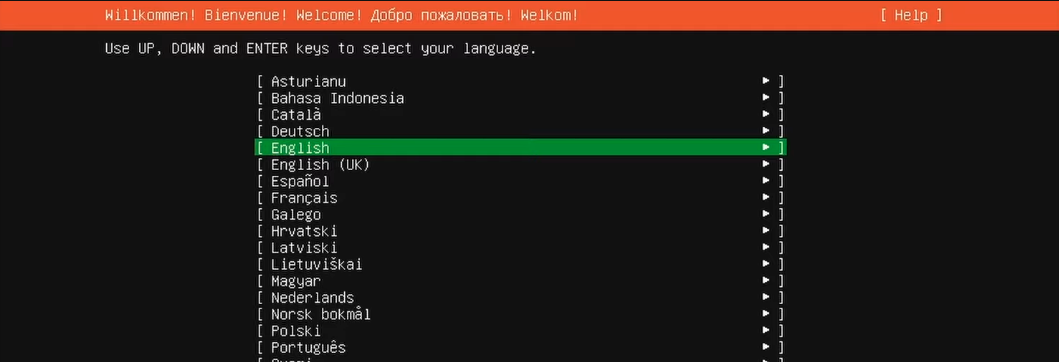
1. System Language: Choose your operating system's language.
It is recommended to select English, as most troubleshooting guides and support documentation are written in English.
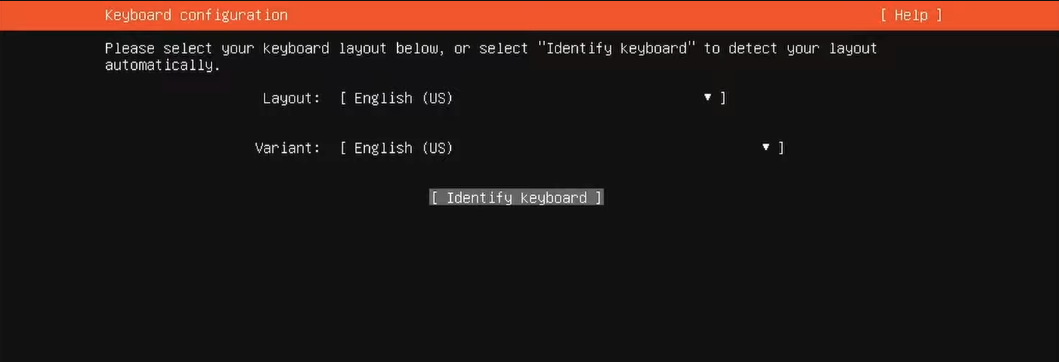
2. Keyboard Config: Select your keyboard layout or click on Identify keyboard and follow the on-screen guide.
The correct configuration ensures that your command-line entries during setup and maintenance work as expected.
3. Installation Type: Choose the regular Ubuntu Server installation for your node.
Detailed differences of a minimal or regular installation can be found in the Operation Systems page of the 🧠 Theory section.
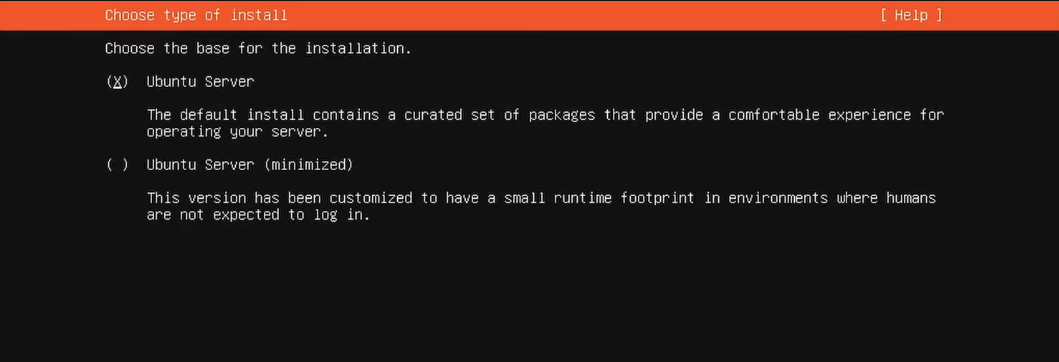
Do not Search for third-party drivers. Additional services could potentially be a harm to security and ease of maintenance.
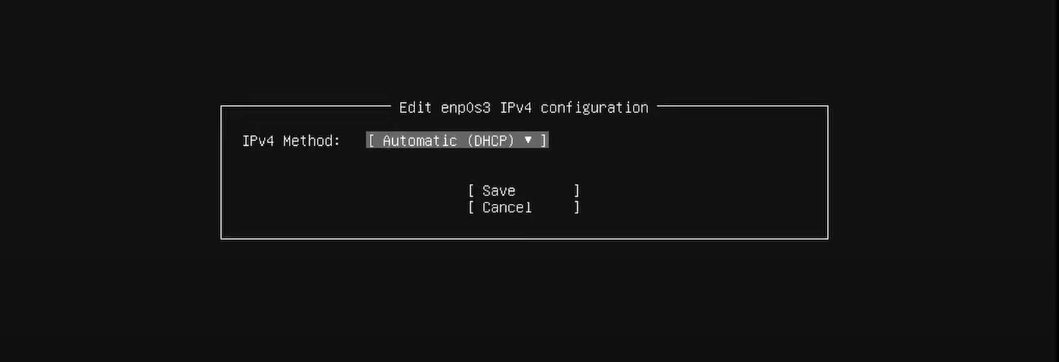
4. Network and Access Settings: Configure your network settings to allow external access to your node.
If your node is connected via Ethernet, set the network type to eth and configure both IPv4 and IPv6 as Automatic DHCP.
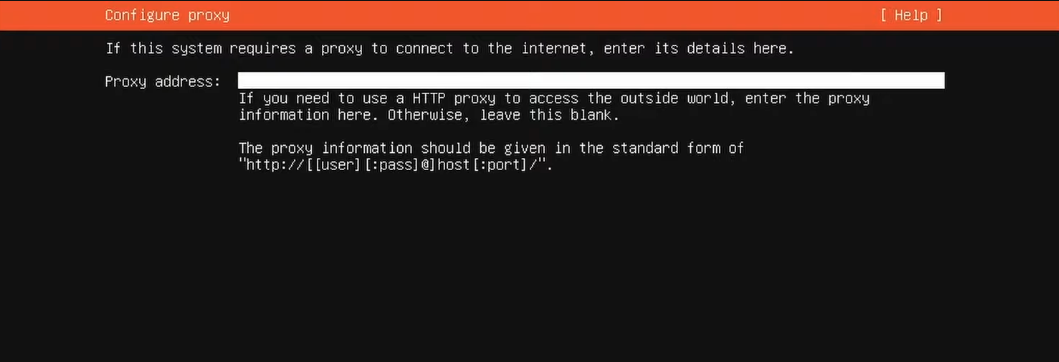
5. Network Proxy: Here, you could select a proxy address. If you do not already have a proxy setup, leave the address blank.
The HTTP proxy and static IP addresses are usually configured later once the node is ready for operation.
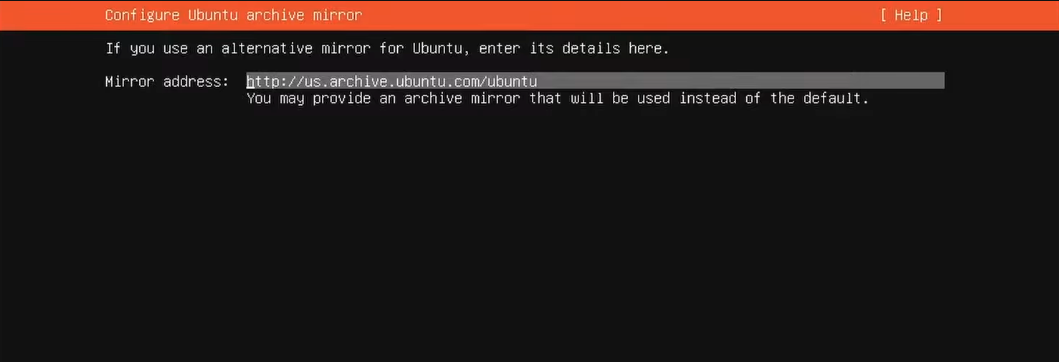
6. Download and Installer: Proceed with the installation using the official Ubuntu mirror address and press Enter.
If a new installer update becomes available during this phase, download the latest version and resume once the update is complete. It's always recommended to use the latest official software release of the manufacturer in case important security updates have been implemented.
7. Storage Setup: For storage configuration, choose to use the entire disk and configure your LVM and encryption setup.
- Logical Volume Management (LVM) is recommended as it allows flexible resizing of storage volumes without downtime. This is particularly useful if you plan to run multiple blockchain nodes or add additional disks in the future. LVM groups multiple physical disks into a single logical volume, simplifying management.
- Full disk encryption is optional. While encryption can secure data, it may complicate remote access by requiring manual intervention at boot. Since your validator keys and wallet are already encrypted, full disk encryption is generally not recommended for this use case.
LVM is enabled by default on new DAppnode machines and has been the default option on Ubuntu since version 20.04.
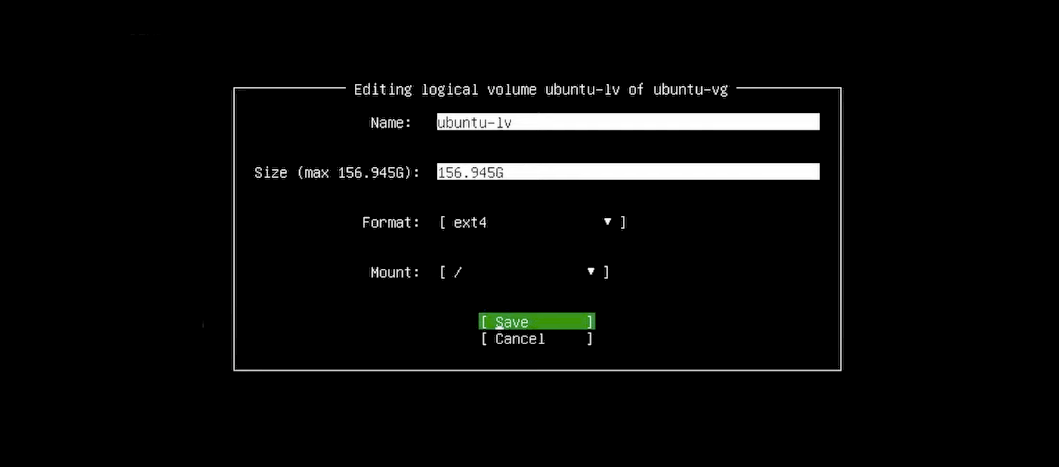
On the storage screen, you will see your available disks along with their mount points. If you enabled LVM, a volume group (ubuntu-vg) with a logical volume (ubuntu-lv) will be created.
- To maximize your storage, set the logical volume size to the maximum available.
- Default naming conventions (e.g., ubuntu-vg and ubuntu-lv) are recommended prevent confusion later.
- The storage format should be kept at ext4, supporting large file sizes, efficient disk allocation, and robust performance.
Further details about disks and volumes can be found on the Disk Management page in the 🧠 Theory section.
User and Software Settings
After the general device and operation system configuration, you will be faced with administrative settings for your node and the additional software to be installed.
1. User Creation: Create your user account and assign a strong password. This account will be used to administer the node.
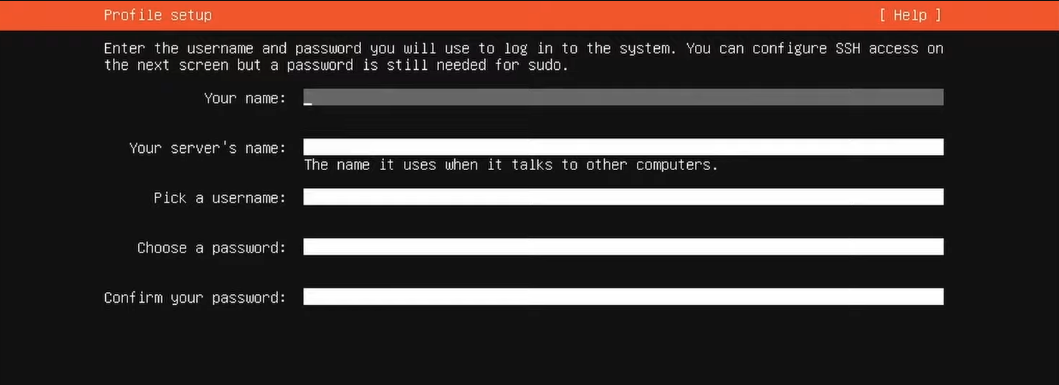
It is advisable to avoid Ubuntu Pro, as this premium service is intended for enterprise use that comes with additional features, security updates, and support compared to the standard Ubuntu release. The primary target are businesses and organizations seeking a more comprehensive and secure Ubuntu experience.
2. SSH Installation: Install the OpenSSH server to enable secure remote access.
OpenSSH is essential for encrypted communication, command-line management, and key-based authentication, offering numerous benefits for remote node administration from your home environment or even global networks.
Further details about node connectivity can be found on the SSH and VPN Tunnel page of the 🧠 Theory section.
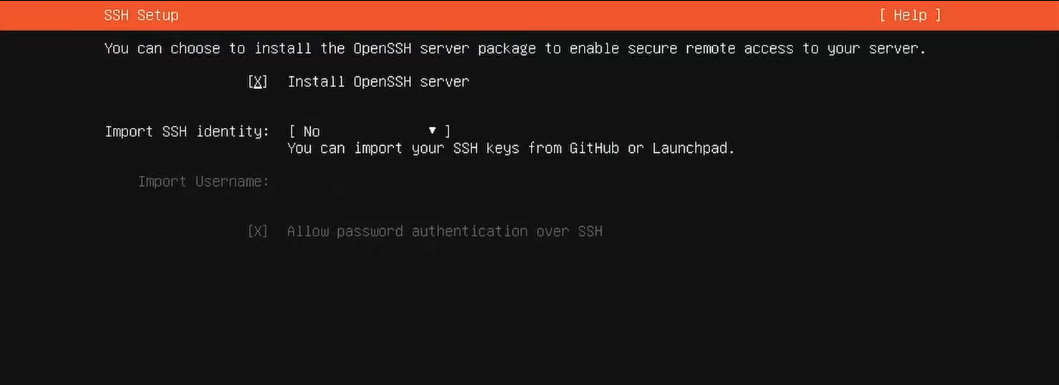
If you do not have an SSH identity yet, leave the field blank. We will configure SSH once the operation system is installed.
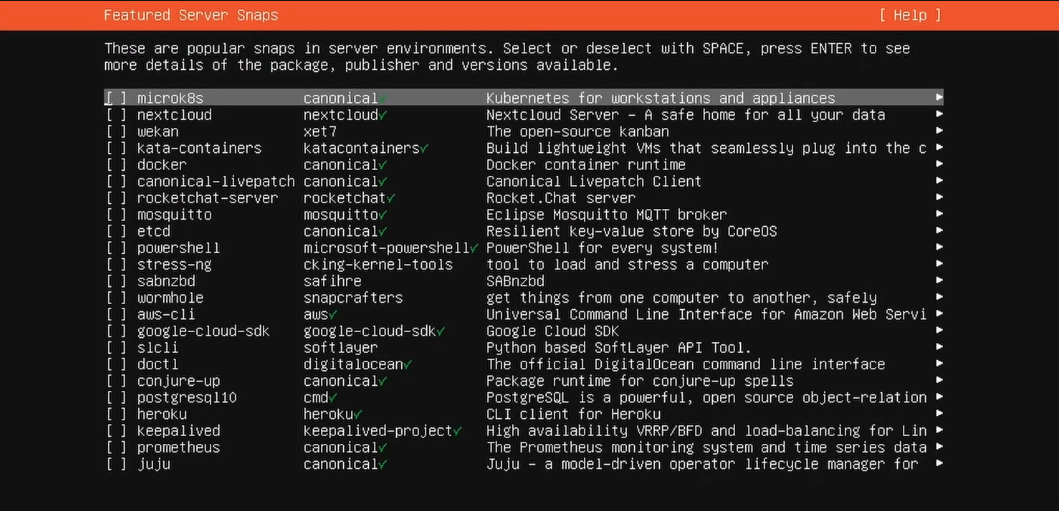
3. Additional Software: Skip through the additional server snaps without enabling extra packages.
It is best to manually install and configure software packages as needed for your specific node setup.
Installation Process
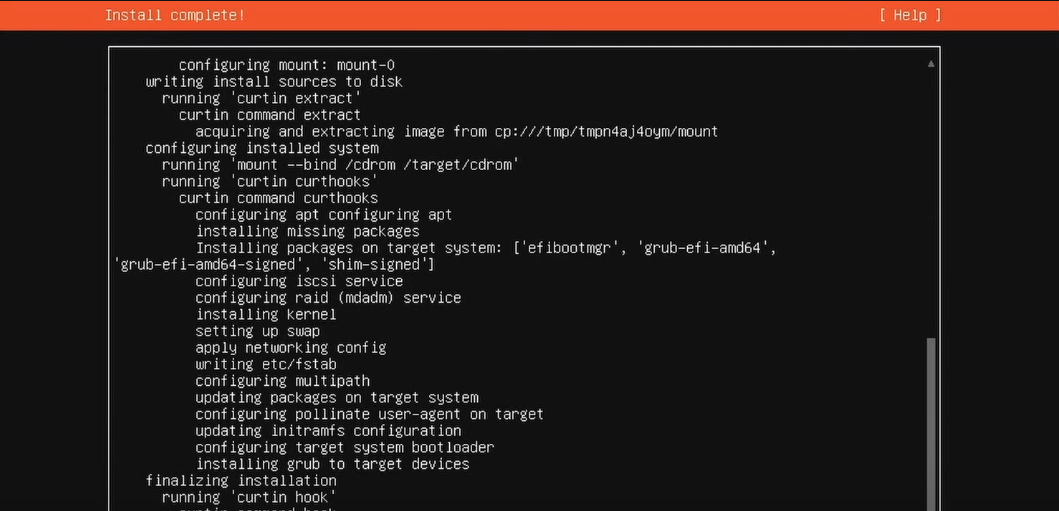
Let the Ubuntu installation process run until it is fully complete. This might take some minutes depending on your hardware components or if you choose to encrypt or configure the disk with multiple logical volumes. Once done, remove the USB device and press Enter to reboot your machine. After the reboot process is successful, you can continue with the system's core setup.
The USB device will no longer be needed. You could reformat it for regular use. However, its generally recommended to label the disk and keep it around in case there are problems and you want to create a fresh setup of your node again.